Tuesday, May 28, 2013

These Muffins are Jammin'

I love this book.
I own cookbooks. Many of them. I get sucked in by the pretty pictures and delicious looking recipes, then they sit on a shelf and don't get a lot of use. I blame the internet. It's just so convenient, and I can compare several versions of a recipe before deciding which to try.


There is one cookbook I use on a regular basis, however. My trusty Fannie Farmer's Baking Book. I have yet to make a recipe from this book that came out poorly. While I'd like to claim that this is all due to my rad-awesome baking skills, the truth is that the book is just full of wonderful recipes.

It also allows something the internet doesn't – the ability to browse when I feel like making something, but don't have anything specific in mind. I was in that mood this weekend; the only thing I knew was that I wanted something sweet-ish that wasn't a cookie.

I settled on jam muffins. A basic muffin with a delicious jam center? There was no way I could resist that,
especially given the simplicity of the recipe.
Yes, two muffins.  One just isn't going to cut it.  Trust me on this.

It should be lumpy still.
It's a very basic recipe – no fancy ingredients – that takes maybe three minutes to make. Three minutes is well within my acceptable morning effort range. Mix the dry ingredients in one bowl, mix the wet ingredients in another*, then mix until just combined. Then you get to drink coffee while smugly reflecting on what an awesome mom you are for making 
your kids fresh muffins for breakfast and blithely ignoring the fact that this means you can delay feeding them actual food for a couple more hours so you can drink more coffee and look at the internet.

The "hard" part is done.  Time to lick the jam spoon!
The only effort involved is getting the jam filling in, and that's really not any effort at all – a layer of batter, a dollop of jam, and top it with more batter. Actually, I was a little concerned about my ability to assemble the muffins without creating a mess; I'm not known for my delicate touch and the recipe specified not letting the jam touch the sides. Luckily, however, I had a nice thick blackberry jam that one of my co-workers gave me for Christmas. It held together in a ball, even when I put the remaining batter on top.

What? This isn't a muffin!
These came out beautifully. They're not cupcakes in disguise like so many of the modern "muffin" recipes; they have just a hint of sweetness in them...and then you get to the jam.  There is just enough jam in the middle to get a little bit with every bite.  There's probably less jam in each muffin than I'd put on them if I was adding it after they baked, but it feels more decadent to eat something with a pocket of jam in the middle.  The only problem is that the recipe only makes a dozen and Zoey and Parker insisted they get their fair share, also. We ran out way too quickly.

Mini loafs maximize the jam.
Then Randy had a wonderful thought. “I bet these would make great mini muffins,” he said. Brilliance! It was a hypothesis that I had to test. You know, for science. While I was at it, I decided to make a mini-loaf as well. They were every bit as good in those formats, also.  I'm pretty sure there is no shape that this recipe would not taste fantastic in.


Runny just doesn't cut it.
While the shape doesn't matter, the filling does.  Unfortunately, I ran out of the blackberry jam, and had to do with a runnier grape jelly for the last few mini-muffins.  It didn't work out nearly as well – the consistency of the jam is important. You need a thick jam that won't run out into a thin layer. A thinner jam or jelly won't stay in the center and you lose that element of fruity sweetness in every bite. Marmalade or preserves would be wonderful. 

The thinner jelly (right) just doesn't work.
And yes, we made two batches in one day and ate most of them that same day. I blame the kids. Zoey had “I need another muffin,” on repeat and Parker toddled behind her shrieking his agreement.  On the second go-round, I added a tablespoon of grated lemon peel to the batter.  Honestly, I didn't notice a huge difference.  I'm not sure if it's because my lemon peel is old (at least three or four years) or because I was in a bit of a muffin coma, but it didn't take away from the flavor at all.  I know I'll make these again and try with fresh lemon zest to see if I can't get a little bit of citrus kick in there.
Who needs Starbucks?  


RECIPE
Makes 12 muffins or 14 mini muffins and one mini-loaf

2 c flour
1T baking powder
1t salt
¼ c sugar
2 eggs, lightly beaten
1 cup milk
8T melted butter
1T vanilla
1T lemon zest (optional)
12 tsp thick jam or preserves.

Pre-heat oven to 400
Mix flour, baking powder, and salt in a small bowl*
Mix sugar, eggs, milk, butter, vanilla, and lemon zest in a large bowl.
Add dry ingredients to wet ingredients and mix until just combined.
Grease a muffin tin. Fill each cup 1/3 full of batter.
Put a teaspoon of jam in the center of each cup, being careful not to let it touch the sides.
Fill the cups the remainder of the way.
Bake for 20 minutes or until a toothpick inserted into the middle comes out clean. (for mini-muffins, reduce time to 15-18 minutes)
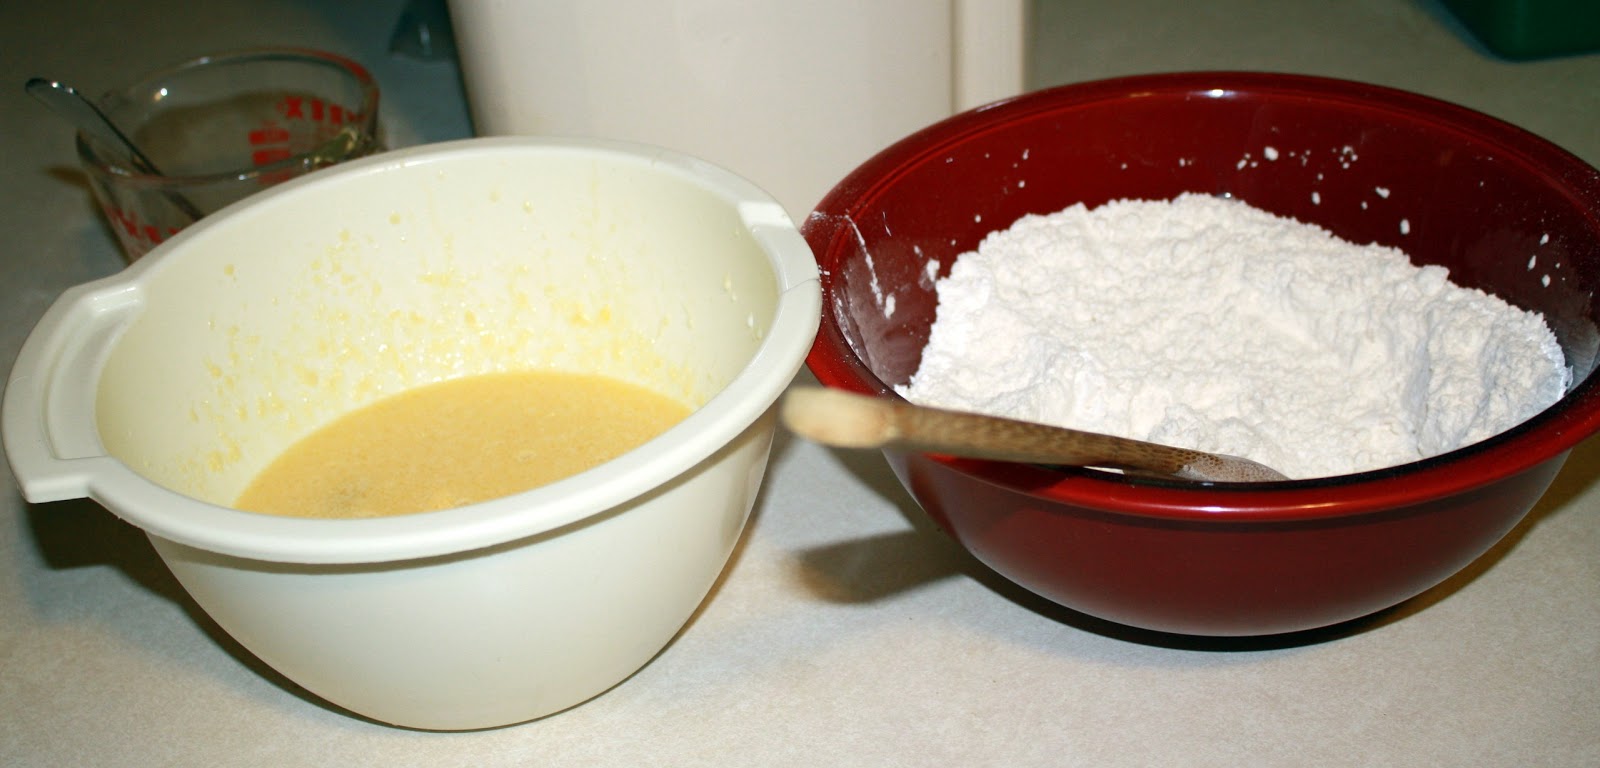

*Full disclosure – I only used two bowls because I didn't realize what I had done until it was too late. Usually, I mix the wet ingredients first and then just dump all the dry stuff on top without mixing it together. If I feel ambitious, I'll put them through a sifter to mix them, but I hate dirtying a second bowl for three seconds of mixing. That's just silly. 
Two bowls? What was I thinking?  That's more to clean!

Monday, May 20, 2013

Pip Pip Cheerio! English Muffins 2.0


I know I've posted about EnglishMuffins before. And I know I've posted about sourdough before. I can't help myself. I love all things sourdough (even cookies!) and when you add in the low level of effort it takes to get hot, fresh English Muffins on the weekend, there's just no way I can resist these.

The best part about these – other than eating them – is that almost all of the work happens overnight while I sleep, thanks to the magic of the sourdough starter. Also, unlike many other English Muffin recipes, these don't require any special equipment; the dough is thick enough that you don't need rings to contain and shape it.

This is a wet starter
This is also a wet starter.

Friday night, mix your starter, flour, and milk. The only complicated part of the recipe is judging how much milk to use. The original recipe for these calls for a difference depending on whether your starter is wet or stiff. Unfortunately, “wet” is a fairly broad term – my starter varies from a pancake batter consistency to something closer to muffin batter. Both qualify as “wet” starters.


Yep, beer time!
Basically, I eyeball it, adding a little more milk or flour until the resultant sponge comes together in a loose ball when I stir it, but it's still visibly wet and sticky.

Then, cover the bowl with foil or plastic wrap and go enjoy your evening. Your work is done for the next 8-12 hours.


Salt, baking soda, and honey.
In the morning, the sponge should be quite a bit thicker than it was when you went to bed, but still fairly loose. Mix in the last three ingredients: salt, baking soda, and honey (or molasses). Spray a cookie sheet with Pam and sprinkle some cornmeal on it.

Seriously, don't skimp.  This stuff is sticky.


Now you are ready to cut out your English Muffins. Due to the consistency of the dough, it is essential to put down a good layer of flour on the counter. Use more than you think you need and cover a larger area than you think you should. Trust me on this. Sprinkle more flour on top of the dough and flatten out to 3/4” thick. Cut out in 3-inch rounds, using whatever you have on hand: biscuit cutter, water glass, mason jar ring, etc. Re-form the scraps to cut out more (make sure there's more flour underneath the dough!) until you've used all the dough.


Place the rounds on the oiled cookie sheet and sprinkle more cornmeal on top. Cover them with a towel and go drink coffee for an hour or so. You've earned it!

Just after cutting out
Nice and poofy!
After the muffins have rested and risen for about an hour, it's time to cook them. Heat a griddle to 350 or a skillet to medium-high (I turn the dial to 7). Once it's heated, cook the muffins for 4-5 minutes per side. They are done when the sides are firm and they are browned on both sides. You'll notice that these poof up quite a bit while they cook. Mine usually deflate once they cool off, but retain the soft, chewy texture they get from their griddle “spring”.


While you are cooking the English Muffins, fry up some eggs and bacon to stuff inside that little bit of deliciousness. Or skip the protien and go for butter and jam, which is Zoey's favorite. Breakfast is served!
A perfect breakfast sandwich, complete with Tapatio!
These are also a great size to use for hamburgers if you don't have buns.  I rarely have hamburger buns, and I'm still trying to find a recipe that I can consistently get good results from.  These, however, I almost always have on hand, and they work wonderfully!

RECIPE
½ cup active sourdough starter
2 cups whole wheat flour
1 cup milk (if using a stiff starter, use 1 ¼ cup milk)
1 T honey
1 tsp baking soda
¾ tsp salt
cornmeal for dusting

  1. Mix starter, flour, and milk until a loose dough forms. Cover and let sit 8 hours or overnight.
  2. In the morning, add honey, baking soda, and salt and mix well.
  3. Turn out onto a floured board, sprinkling more flour on top of the dough
  4. With your hands, flatten the dough to ¾” and cut out 3” rounds
  5. Place rounds on an oiled cookie sheet dusted with cornmeal, dusting the top with more cornmeal.
  6. Cover and let rise for about an hour
  7. Cook on skillet or griddle heated to medium-high (350 degrees or turn dial to 7) for 4-5 minutes on each side

Thursday, May 9, 2013

Homemade McNugget Meal - I'm Lovin' It!


I love cooking. That doesn't mean I always feel like cooking when I get home. And yeah, we try to keep some easy dinners on hand in the freezer, but sometimes we're out of them...or just sick of them. On those days, the following conversation occurs:

“We should just go get dollar menu food.”
“Perfect! You go.”
“Me? I'm not going, you go!”
“Screw that, I'm not going anywhere, but you totally should, it sounds really good.”
“You know, it really doesn't make sense to spend the money on fast food.”
“I suppose you're right.”
“It does sound good, though, if you want to go get it...”
“Nah. You're right, we shouldn't spend the money. Besides, it's healthier to eat at home.”

And then I make dinner. Not because it's cheaper or healthier, although it is, but because any amount of effort in the kitchen is somehow less than getting in the car and driving the mile to McDonald's.  Usually on these nights, I end up making chicken nuggets and fries. This isn't what we'd have ordered, but it's significantly less effort than making buns, grinding beef (if we even have any) and making hamburgers.
To distract you from my extreme levels of laziness, here's a picture of one excited birthday girl!


The best thing about this meal is that it can all cook at once in the oven. I can throw it in, and go sit down for a little bit. On the type of evening where I want to get fast food, sitting down is high on my priority list.

The process starts by pre-heating the oven to 420. Throw 2-3 pieces of bread in the oven to dehydrate while it preheats. My oven takes forever and a day to get up to heat, so it works out pretty perfectly. Your mileage may vary. You may prefer to buy bread crumbs or use cornflakes so you can skip this step. Really, whatever makes your night easier is the solution here, with the caveat that you need some sort of bread-type product.  

The less motivated I am, the bigger these fries get
While waiting for the oven, peel up a bunch of potatoes. How many depends on size and relative hunger, but my general rule of thumb is one mid-sized potato per person. I count Parker and Zoey as full people, both because Parker eats like Paul Bunyan and because I know Randy and I will clean house on any leftovers. And if we don't, potatoes are so cheap that it's only a waste of $0.07, which I'm willing to live with.

Anyway, once the potatoes are peeled, cut them into 1/4” (ish) slices, then rotate and cut those into strips.
Just like with the Brussels sprouts recipe, throw them in a gallon-sized Ziploc bag to season them. I love my Ziploc; they let me mix things up without making a mess or coating my hands with oil and spices. Here again, you have a lot of options. I try to mix up the seasonings, but I always use olive oil to coat the potatoes, then add salt and pepper and curry powder, or garlic, or parmesan, or...

All the extra oil sticks to the bag!
Give the bag a few good shakes to coat all the fries evenly – or, if you're brave, give the bag to your kid to shake, then dump it out onto a greased cookie sheet. After a quick shake to get the fries in an even-ish layer, toss the bag, and half the prep work is done.
There's no such thing as over-garlicked fries

The chicken nuggets are almost as easy, although a bit messier. Dice up about a pound of chicken breasts or
thighs. I personally prefer the flavor of thighs, but I'm more likely to have boneless breasts, so I go with the breasts. Nothing about de-boning a chicken thigh says “low effort” to me. After cutting the chicken up into bite-sized pieces, comes the prep for the only mildly effort-ridden part of the dinner – breading the nuggets.
Size varies with motivation here, too

By this point, the bread is usually nice and dried out. If not, I declare it dried out enough because I'm not waiting! A few quick pulses in the food processor creates nice bread crumbs. If the bread isn't fully dried out, some of the crumbs might be a bit on the large side, but hey, it just gives better texture, right? (It's really not hard for me to justify taking shortcuts here, if you haven't noticed). Two or three pieces of bread will create around a cup of crumbs. Add an equal amount of flour and some spices and the breading is done.
There's no way to avoid egg hands

Beat up a couple of eggs to dip the chicken in. Coat the chicken in eggs, then the bread crumb mixture, a few pieces at a time. Try to ignore the nasty buildup of egg and flour on your fingers. It's inevitable and there's no point in cleaning it off until the process is done.

I'm sure at this point, you are wondering why I don't bust out the magical Ziploc to solve the problem. Sadly, this is the one area my trusty Ziploc has failed me in. Not enough of the breading sticks, and what does stick does so unevenly, as the chicken pieces try to stick to each other instead of the breading. Momentarily putting up with hands that feel like they're turning into the Tree Man's is a small price to pay.

Go crazy with the breading; it's worth it
Once the chicken is breaded, it goes on a greased cookie sheet and both pans go in the oven for 15 minutes, while you sit down with a drink of your choice. After 15 minutes, pull the chicken out, and flip the fries. Cook the fries for an additional 15 minutes while you relax some more.

There's only about 10-15 minutes of active effort involved, which is about as long as it would take to go and get food from the drive through. And it comes with the benefit of being cheaper, healthier, and (most importantly) not requiring you to put on shoes and leave the house.
Mo-om! Quit taking pictures so I can eat!

RECIPES:

Baked French Fries
4 medium potatoes
1 T olive oil
1 ½ tsp salt
1 tsp pepper (or to taste)
optional: 1 T curry powder (Seriously, try this. You won't regret it!)
or
1T chili powder
or
¼ c grated Parmesan cheese
or
1T minced garlic

  1. Pre-heat the oven to 420
  2. Peel the potatoes
  3. Cut the potatoes into 1/4” sticks
  4. Put potatoes, oil, and seasonings into a gallon-size Ziploc and shake until all fries are evenly coated
  5. Put fries in a single layer on a greased baking sheet.
  6. Bake for 30 minutes, flipping halfway through.

CHICKEN NUGGETS
1 lb chicken
2 eggs
2-3 pieces of bread (or 1 c bread crumbs)
1 cup flour
2 tsp salt
1 tsp pepper
1 ½ tsp chili powder
½ tsp cumin
½ tsp paprika

  1. Pre-heat the oven to 420 degrees.
  2. Put the bread in the oven to dry out as the oven pre-heats
  3. Cut the chicken into bite-sized pieces
  4. Beat the eggs
  5. Mix the flour and spices together.
  6. Remove the bread from the oven and pulse in a food processor until you have small, even crumbs
  7. Add the crumbs to the flour mixture and mix thoroughly.
  8. Working with a few pieces at a time, coat the chicken in the egg mixture
  9. Press the chicken into the bread crumb mixture until coated thoroughly and evenly
  10. Place the on a greased baking sheet
  11. Bake for 15 minutes