Saturday, May 26, 2012

Taking on Tortillas


I've wanted to try my hand at making tortillas for a while, but I've heard that to make a really good tortilla, you have to learn from someone who grew up making them. Randy wanted to hold out for a tortilla press so he didn't have to roll each tortilla out.

Tortillas now and no-one gets hurt!
And so we thought about it, talked about it, said how nice it would be, but never actually attempted making any.

Then the lower element in our oven blew out and the replacement element got back ordered. Two weeks later, we were out of bread, out of tortillas, and still a week away from grocery shopping. At that point, we decided we might as well try our hand at it, especially because Zoey – for some unknown reason – had decided that tortillas were her favorite food and kept asking for some.

I was tied down with Parker, the hungriest baby on the block, so Randy stepped up to the task.
Dreaming about his next meal

The first batch came out OK, but not great – we cooked them on the electric skillet and kind of winged it temperature-wise. The result was tortillas that were a little too stiff and a bit crispy, but that still only had light browning. Luckily, they are easy enough to make that we decided to try again.

The basic recipe is simple:
2 cups all-purpose flour, ½ tsp salt, ¼ c oil, and 2/3 c warm water. Four ingredients. Total. Simplicity at its finest.

For contrast, here's the ingredient list for Mission brand tortillas.
Enriched Bleached Wheat Flour (Wheat Flour, Niacin, Reduced Iron, Thiamine Mononitrate, Riboflavin, Folic Acid), Water, Vegetable Shortening (Interesterified Soybean Oil, Hydrogenated Soybean Oil and/or Palm Oil), contains 2% or less of each of the following: Salt, Leavening (Sodium Bicarbonate, Sodium Aluminum Sulfate, Corn Starch, Monocalcium Phosphate and/or Sodium Acid Pyrophosphate, Calcium Sulfate), Distilled Monoglycerides, Enzymes, Wheat Starch, Calcium Carbonate, Antioxidants (Tocopherols, Ascorbic Acid), Cellulose Gum, Dough Conditioners (Fumaric Acid, Sodium Metabisulfite), Preservatives (Calcium Propionate, Sorbic Acid and/or Citric Acid).

I don't see the resemblance, personally
I will take the four-ingredient list and fresh flavor/texture over store bought, especially now that I know how easy they are to make! The texture is better, too – it's light and slightly chewy, compared to the relatively dense versions you can buy. Of course, mine don't have the nice round shape they're supposed to – Randy keeps comparing them to the Millennium Falcon – but they still taste fine! His, of course, come out nearly perfectly round, the fink. If we had a press, I could make round torts too. Probably. If someone wants to buy me a press, I'd be glad to test the theory!

Randy tried to improvise a press
Surprisingly, these are not healthier, calorie-wise, than the commercial tortillas. They run about 60 calories/tort higher. However, the absence of preservatives and additives tips the balance back in favor of homemade, at least in my book. Also, the homemade version has about half the sodium as the store bought. You can save some calories (about 15/tort) by using shortening rather than vegetable oil (vegetable oil is about 40 calories less per tort than canola oil. Olive oil doesn't work very well with these) and in fact, many recipes call for shortening rather than oil. I used oil because, well, we don't have any shortening.

Extra calories aside, these tortillas are worth the effort because of the freshness and flavor. They also cost much less to make than to buy – and you can customize the flavors however you wish. If you've ever bought flavored tortillas – even just whole-wheat – you know that any deviation from the basic flour drastically increases the price...and rarely will you find anything other than whole-wheat, tomato, or spinach. At home, however, the opportunities are endless.

I decided to play around and try some flavors I hadn't seen before. I made three batches of flavored tortillas: jalapeno/cilantro, garlic/rosemary, and honey/wheat. All three flavors came out well although the whole-wheat wasn't as exciting.

Left to right: Jalapeno, Wheat, Garlic
Even cooking three batches only takes minutes, and I was left with extras to freeze. In my two-minute google search for how to freeze fresh tortillas, I found that rolling them out and freezing them uncooked is the worst way to go – they don't cook up as well. Either freeze the dough in balls and defrost/roll out when you want to cook them, or cook them, then freeze. I opted to cook them first, just because I already had the production line going.
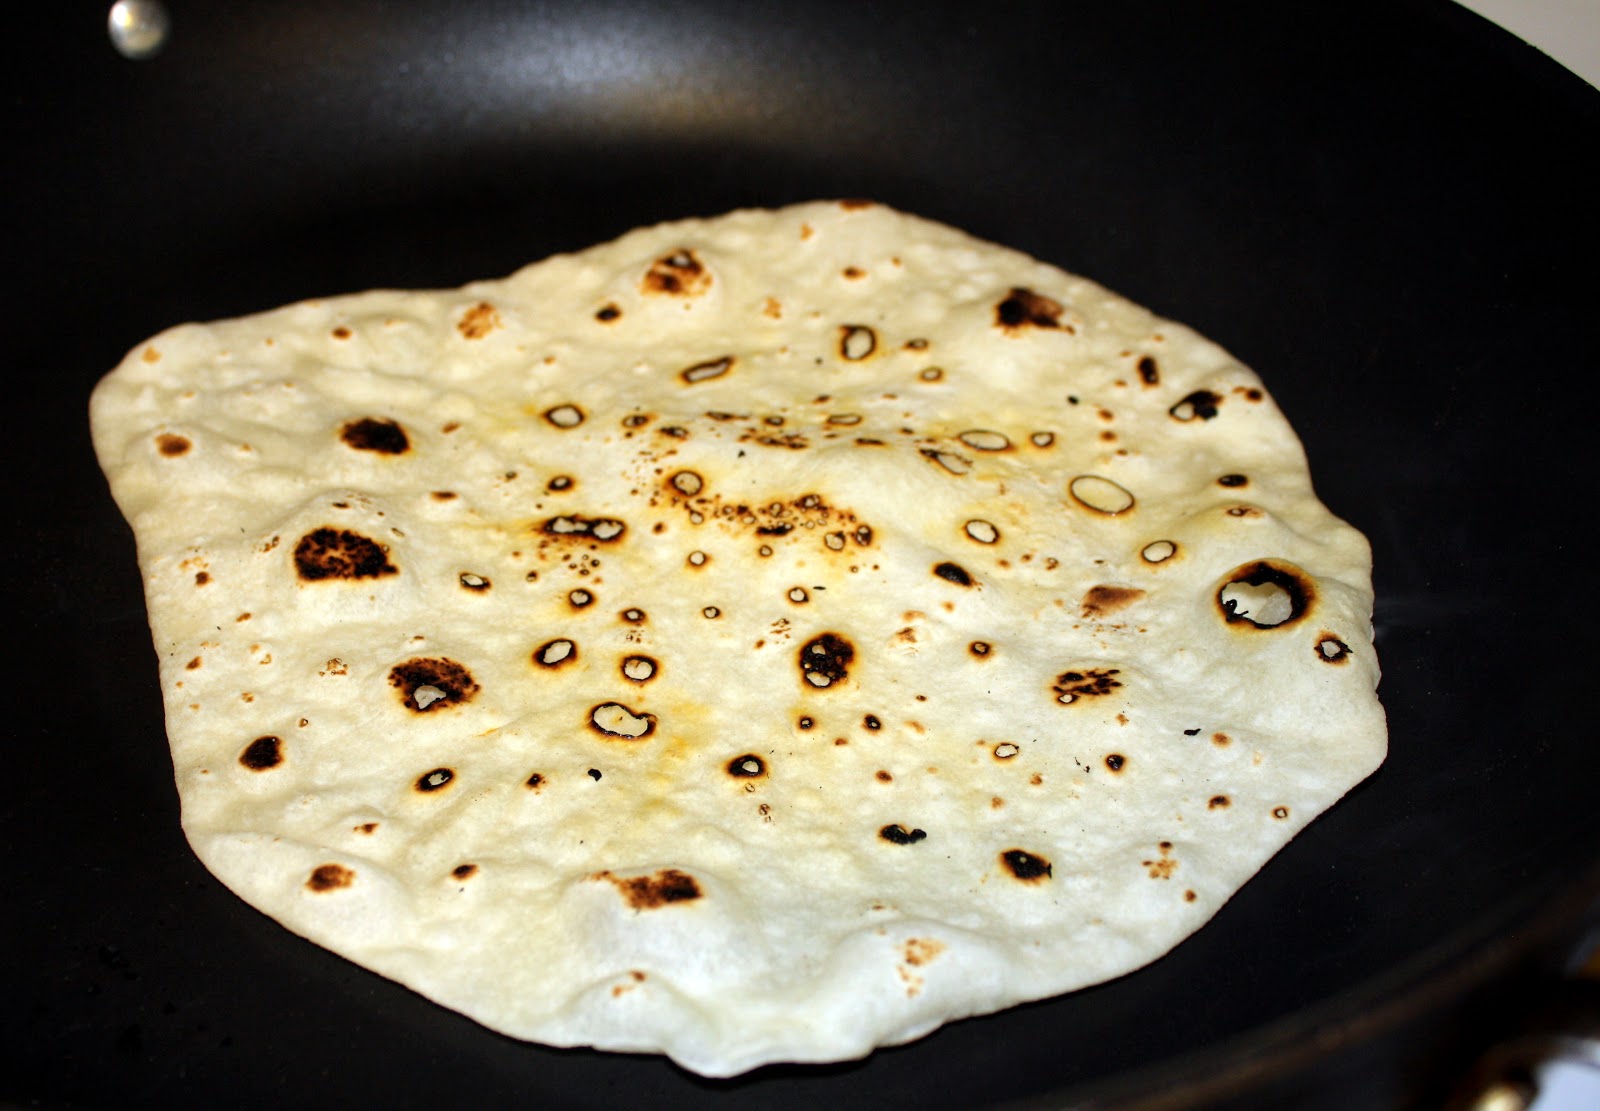
About 10 seconds after hitting the pan
Flipped and done


RECIPE
Basic Flour Tortilla
2 c all-purpose flour
½ tsp salt
¼ c oil
2/3 c warm water

Mix all ingredients until they form a soft dough.
Knead for five minutes or until dough becomes elastic
Let rest under a kitchen towel or plastic wrap for 15-30 minutes
Separate dough into 6 equal balls
Heat a skillet on high until smoking hot
Roll each ball out to approximately 8 inches in diameter
Stack, separated by foil or wax paper until ready to cook.
Cook one at a time for 10-20 seconds per side. The tortilla should puff up when it's ready to flip and should have dark brown spots on it.
Stack the cooked tortillas on a plate and cover with a damp towel.
See the steam?  That helps give them the nice chewy texture

FLAVOR VARIATIONS
Jalapeno/Cilantro*
Add ¼ finely minced nacho jalapenos and 1T dried cilantro to dough. You will likely need to add a bit more flour (up to ½ cup) to counter the extra moisture in the jalapenos. It is important to get a fine mince on the jalapeno, as the tortillas have a tendency to tear near larger pieces. Also, don't roll these out quite as thinly to prevent tearing.

Rosemary Garlic
Add 1T dried rosemary and 2T finely minced garlic to the dough. You will likely need to add a bit more flour (up to ½ cup) to counter the extra moisture in the garlic.

Honey/Wheat
Substitute one cup wheat flour for one cup of the all-purpose flour. Add 1T honey.


Sunday, May 20, 2012

Parker Riley Barnes, aka "The Hulk"


He finally showed up! I had to go in and be induced, but Parker Riley Barnes consented to be born on May 15, 2012 at 6:41 PM. He weighed a whopping 9lbs 8oz. The entire stay at the hospital, every nurse that came in exclaimed over how big he was.
He's a big boy!  85% in weight, 92% length

When we finally got to go home, we were unsure how Zoey would react. After all, we had disappeared for two days – the first time in her entire life we spent a night without her – and come home with a new child. She was thrilled! She had an amazed look on her face and just wanted to look and look at Parker. She kept saying “BIG baby!” I think she expected him to be the size of one of her dolls.

He's bigger than a burrito from Gorditos!
Since then, she's mellowed out a bit towards him, but still wants to hold him quite a bit. Unfortunately, that usually coincides with when I'm feeding him, which doesn't work out so well! The only time she's been eager to give him back was last night when she was holding him and he audibly pooped, causing her to recoil and say “Here you go, Mama” and bolt from the chair.
This is the best game EVER!

This onesie was made at my baby shower; Misty had us all create custom dino clothes for Parker

He has a nose!


She also likes to play with him on his floor gym. She mimics what he's doing, giggling the whole time. So far, his tummy time has been pretty impressive – he's already rolled over a couple of times, once at two days old and again at four days old! He also managed to push himself from one side of the mat to the other. I'm pretty sure he's going to be a professional athlete.
They'll always play this nicely together, right? 
Trying to crawl and getting pretty upset at the lack of traction

Things I've learned:  
1) the rocking chair needs a more comfortable pad. This wouldn't be an issue if Parker would learn to sleep in his crib at night instead of demanding an all-you-can-eat buffet between 11PM and 4AM. I know I could move to the living room with him and have more comfortable seating, but for some reason, I'm convinced that staying in his room will lead to him figuring out the whole night/day thing faster. There's no evidence of this, but hey – it's only been four nights...and last night, he actually slept in his crib for almost 45 minutes, so I got a little snooze in the middle of the night, which was wonderful.

2) Boys are expensive. Did you know most insurances don't cover circumcision? Neither did I, until the pediatrician told me. Yikes. We could save money on food simply by being too tired to make food. However, Zoey is not too tired to eat, so we have to make meals anyway.

3) If you get a spurt of energy, use it. It's different from when Zoey was born, because with her, all we had to worry about was us...and we didn't care all that much about ourselves during the initial sleep-deprived weeks. Zoey pretty much insists that we continue life as normal whether or not we have any energy. The saving grace has been those caffeine-fueled spurts of energy that lead to prepping food for quick cooking later on. Not taking advantage of those moments means that we are all cranky and irritable when it comes to making dinner – Zoey because her meals are late and lacking and Randy and I because we have no energy and everything takes too much work to make, especially with a cranky toddler. If we were smarter, we'd have done all this in advance like we kept talking about.


Monday, May 14, 2012

Back to Basics: Baking Soda


Well, Parker hasn't shown up yet. He apparently is quite comfortable where he is, thank you very much! I was positive he'd have arrived by now.  On the plus side, the weather has been gorgeous all week long, and I'm on maternity leave already, so I got to enjoy it!  

Still, it means I'm sitting around waiting...and waiting...and waiting.   I even had an induction scheduled this morning that got bumped to tomorrow.  Not sure how Parker managed that one, the little stinker!

Unfortunately, it means no cute baby pictures to share.  Instead, you get...baking soda! Woo!

I know it's not nearly as exciting, but at least it's not dead air, right? There are several uses for baking soda and vinegar as cleaners. Baking soda can clean a wedding ring with decent results, if you're too cheap/broke to take it in to get cleaned (that's me!). Vinegar can replace rinse agent in a dishwasher or fabric softener in the laundry.

However, none of these really are fascinating uses or provide good pictures. I'm all about pictures. More fun and visually stimulating (although still not terribly exciting) is using baking soda and vinegar to clean your drains. At our last house, we had nasty, nasty drains. We poured gallons of Drain-O and similar products down them with pretty terrible results. Poor results + expensive products + adding nasty chemicals into the ground = three strikes and you're out in my book!

Luckily, this house has better drains, but they still need cleaning occasionally. After a little research (read: mindlessly dinking around on the internet and stumbling across some interesting uses for baking soda/vinegar and then looking at a couple more sites to verify the information) I discovered that this combo can clean drains. Something about the chemical make-up of the baking soda cutting through grease, etc. I think the vinegar is just for fun foaming action. Maybe the bubbles help knock stuff loose as well, but does it really matter after the science experiment you just completed in your sink or tub?

The process:
Pour some boiling water down the drain. This loosens things up a bit, at least at the surface level.


Dump ½ cup or so of baking soda down the drain. Let it sit there for a few minutes. This step involved more work than I expected, mostly because I couldn't remove the stopper to the drain, which meant that I had to work the baking soda into the drain with my fingers. While obnoxious, it wasn't all that difficult.

Well THAT didn't work the way I expected...
It took a few minutes, but I jammed it all in
Ooh!  Ah!  Bubbles!
Pour 1 cup of hot vinegar down the drain. Watch the fun bubbles. Plug the drain for better agitation/knock-stuff-loose-action. I didn't plug mine because a) I was having fun showing Zoey the reaction with baking soda and vinegar and b) the baking soda was packed into the drain so tightly that it wasn't going to move until the vinegar had its way with the soda anyway.

Pour some more boiling water down the drain to rinse it all clear.

People have different results with this, and there are a plethora of methods people use; there are also a lot of people that argue against it. From what I've read, this works best as a preventative measure; it doesn't really eat away at a clog, although it will help cut away the grease that holds a clog in place so it can move on down the line. To me, as long as the drain works better than it did before, it's a success.

The only drain I had that was at all slow was my bathtub. This is usually the worst drain, given the amount of hair I have and its tendency to shed into the drain. The baking soda treatment seems to have worked to speed it up. And hey, if it didn't, it cost me less than a quarter, rather than $4 for a bottle of drain cleaner. That's a cost I can live with.


Next steps:
After Parker is (finally) here, I'm going to try the unfortunately named “no-poo” method. Luckily, the “poo” in the name stands for shampoo. Why proponents think people will want to try it after giving it that name escapes me. On the other hand, I'm going to give it a shot, so I guess it worked after all. Basically, it calls for using baking soda/water instead of shampoo and replacing conditioner with apple cider vinegar.

The theory is that commercial shampoos over-strip your hair and convince your scalp it needs to produce more oil than necessary, which then requires you to shampoo more frequently with even crazier chemical compounds. I'm all for simplicity (and saving money – baking soda is $0.50/lb in bulk, which is significantly less than the cheapest shampoo), so I have wanted to try this for a while.

The only problem is that it takes a couple of weeks for your head to stop over-producing oil, which means you look pretty greasy while you adjust. That's why Parker's arrival will make such a good time to try it – no-one expects a new mother to look her best. 

And hey - if it works, I may never have to clean the tub drain again, since I'll be sending baking soda and vinegar down it on a regular basis!

Next week will be Parker pictures – there's no WAY he's not going to be here by then.


Monday, May 7, 2012


It started when Randy's brother, Cody (aka Uncle Buck), sent him some messages on Facebook – he wanted to make jam. There were two recipes he wanted to try: spiced blueberry and apple. I was all for it, although I will admit to some hesitation when I realized the two of them would make the jam while I was at work.

Boys in the kitchen. Unsupervised. With alcohol. And boiling sugar. Yikes!

On the other hand, jam is pretty easy and foolproof. Also, it worked out well for us in that Cody was providing everything but the jars and the pectin. Randy was providing the “experience” and the kitchen.

Needless to say, I left work as quickly as possible that day so I could see how they did/assess the damage. When I got home, they were working on the second batch – the blueberry spice. Their commentary went something like this:

Cody: Ok, now we add the sugar and boil for five minutes
Randy: Huh. I added sugar a long time ago.
Cody: Oh. Uh...then I guess we add the stuff and call it good?

I'm pretty sure that was how the first batch went as well; wasn't there for most of it, as I said, but they took pictures, so I'll provide a pictorial essay.
First step: set up the all-important directions.  Use your wife's laptop in case  of industrial accidents...


Get the canning kettle going. Uncle Buck demonstrates how to use a lid!

Put some sugar and other spices in a pot.
Chop up some apples.  Be sure to have all the ingredients out on the counter
Are you two sure you used a big enough pot?  That's a lot of apples.
The toddler was right - pot upgrade initiated!

Apple jam in the jars and ready to seal - looking pretty good.
Hot.  HOT!  Someone should have used a potholder...
ANOTHER batch? Are you sure?
Start over, measuring out the blueberries
Every surface of the kitchen was covered in jam-making paraphernalia, and Zoey was on a huge sugar high, since her Uncle Buck kept feeding her cookies, but it all turned out well - each batch made six or seven jars, and they all sealed well.
I like it when Uncle Buck comes over!  Cookies for everyone!

The end result was pretty tasty, although the blueberry jam has anise in it, which I'm not a huge fan of (I have a lifetime supply, though, because Cody left his jar here and he only used a little of it!)

Recipes: 
1.2 kilo apples
1 kilo sugar
1 packet of pectin
1 teaspoon vanilla sugar
2 teaspoons of ground cinnamon
1 Big bowl of water with the juice of 1 lemon squeezed into it.

*Quarter the apples, peel and core them, then chuck every apple quarter into the bowl with water and lemon juice.  (This will keep the apples white/ green/ yellow (so they don't get brown and horrible )).
*Once you have cored and peeled and quartered all the apples , stage 2 is getting all the apple quarters thinly sliced, then in thinly cubed.Think 1 x 1 mm !
*Chuck the tiny cubes all in the big pan, add the sugar, the of pectin ( don't breathe in, it will make you cough ) the vanilla sugar, and the cinnamon.
*Stir the whole thing through- ( this can be a bit heavy going ) till you have a thick gloop.
* Put it on a medium heat and cook for at least half an hour, stirring frequently.  Don't go and do something else and leave it bubbling away.
*Test if the apple is "done " ( = soft )- this can take quite a bit of time.( so say make it at least 40 minutes).
*WHILE waiting for the apples to cook: Let the jars you intend to use for your jam run through a dishwasher cycle, till they are clean and warm, or clean them with boiling water.  Put the lids in a small saucepan and bring to a simmer.  Turn off the heat, and let lids sit in the water.
*Fill your canning kettle 3/4 with water and bring to a boil
*Fill the jars, leaving 1/2 inch headroom
*Wipe the rims clean, then put on a lid, screwing the ring on tightly
*Fully submerge in the boiling water for approximately 10 minutes.  
*Remove and let cool - you will hear a popping sound as the lids seal.

Spiced Blueberry Jam from this instructable
1 1/2 lbs . Blueberries (fresh or frozen)
3 cups Sugar
1/2 cup Water
2 Tablespoons Lemon Juice
5 Tablespoons (2 1/2 oz) Cider Vinegar
1/4 teaspoon Star Anise (finely ground)
1/4 teaspoon Ground Cinnamon
10 - 20 grinds fresh Nutmeg (1/4 teaspoon pre-ground)
1 Packet of Pectin

*Run all jars through a cycle of the dishwasher or boil for 10 minutes.  Put the lids in a small saucepan and bring to a simmer, then turn off heat, leaving lids in pan.
*You need to grind up the spices, especially the star anise. Put them in the coffee grinder until finely ground.
*Place blueberries in the saucepan over medium-low heat. Sprinkle with the pectin, followed by the cider vinegar, spice mixture, and lemon juice.
*Once liquid starts to gather in the bottom of the saucepan, bring the heat up to high, and bring to a boil.
*After reaching a boil, lower the heat slightly and boil gently for 5 minutes, mashing it occasionally.
*Mash in the sugar, and add the water. Return to a boil for 1 minute. 
*Fill your stockpot 3/4 of the way full with water, and put your dish towel/canning rack into the bottom.  Bring to a boil.
*Fill jars, leaving 1/2" head room.  With a clean towel, wipe any spills from the rim
*Place the lids on the jars, screwing the rings on as tightly as you can.
*Place jars into stockpot and boil for approximately 10 minutes. 
*Remove jars and put on a towel or rack on the counter to cool.  You will hear a pop as each jar seals.

Next week's post will probably be on Parker's birth and mostly include a zillion baby pictures.  If it's not...well, he's late to the show!

Sunday, April 29, 2012

Getting Started On Gardening


When we moved in, we asked the landlord if we could plant a garden, and got permission. Immediately, we started planning. As these things go, our plans got bigger and bigger – never completely out of control or ridiculous, but pretty elaborate for a couple that has successfully made one garden ever (and it had all of four different things in it).

This time, however, Randy had been reading and researching different things to plant and what would grow here, planting schedules, etc. We were ready. Unfortunately, a combination of nasty weather, a failed grow-box experiment, and lack of funds to buy the dozen different packets of seeds we wanted combined to simplify our plans.

The final plan:
Three raised beds made from 2”x6” boards. The beds are 3'x7'. We chose those dimensions for two reasons. First, we knew we'd have a trellis of some sort built along the back of the beds and wanted to ensure we could easily reach the back of the bed, so we didn't want to make it more than three feet deep. The seven foot length was a result of Home Depot's pricing; the true 8-foot lengths cost $5/board, but the slightly shorter boards we bought only cost $3/board. Sold!

Along the back of the main beds, we built a trellis using leftover fencing. It's not as tall as we will probably end up with (only about five feet) so we will probably make a PVC/twine extension that – while not attractive – will serve to let the vines grow taller.


Herb/garlic bed
One raised bed measuring 1'x7' for herbs. This got changed into a garlic bed because of a lack of herbs and a plethora of garlic. I'm ok with this; there is no such thing as too much garlic.

One planter measuring 6”x3' from my sister for planting garlic.

One “planter” for blueberries made from a large rubbermaid bin.

A non-raised bed along the side of our patio for strawberries, measuring 2'x8' or so. This one needs the most work still.

We filled the beds with high-quality fertilizer courtesy of my mom...more specifically, my mom's three horses. The soil here is not great – sandy and rocky – but the composted horse manure should help it out significantly. It took two pickup loads of manure to fill all the beds. The manure is dense and rich and loaded with worms, which should help the mixing process immensely.

Crops:
As far as crops go, we had originally planned for about 20 different types of vegetables, including some that needed to start inside. Randy built a miniature grow-box out of a milk crate, some old yogurt containers for planters, and a shop light, and tried to start ten or so broccoli plants. Unfortunately, each container seemed to grow something (or things) different from each other, none of which looked like broccoli. Combining that with the need to use our starter room for a nursery, we decided to put that off until next year...or maybe the year after...when we could afford to build a more permanent station in the garage.

Also, as it got closer to time to plant, our budget got tighter and we didn't have the money to go on our seed-buying spree. We took stock of what we had already and got some freebies from my mom, who always has leftover seeds and my sister, who is working on a sustainable garden – using the crops she has to collect seeds to re-plant the next year. Check her blog out at rainydaygardening.com! 

Now our plan is to plant the following:
Peas and beans along the trellises. You can never have too many of these two things, in my opinion. When we were kids, Sarah and I got in trouble every year for stripping the garden of peas. I doubt my restraint has gotten much better. Fresh peas are one of the world's tastiest treats. Green beans aren't quite as irresistable right off of the vine, but I can make any excess beans into spicy dilled green beans, which are irresistable.

Potatoes. Just yesterday, my sister gave us a bag of seed potatoes. We haven't quite decided where these will go yet – we may put them in a bed, but we might also find/build a container for them so we can try some techniques to maximize output.

The garlic is growing quickly
Garlic. My sister got me a planter and three types of garlic for my birthday, and my mom gave me a bulb of elephant garlic to use to plant. Of course, I planted them way too late, so they won't get as wonderful and developed as they should, but better late than never!

Tomatoes. We got some seeds from my parents, but it's too late to plant seeds, so we'll get some starts from my school's upcoming FFA sale. I love working at a school with an active FFA. We might also try making some of our own starts just as a test – we have the seeds, after all, and there are plenty of ways to use tomatoes.

Cucumbers. Our plan was to plant and pickle, but we have seeds for slicing cucumbers, not pickling cucumbers. We'll do some research into what kinds of pickles we can make/how to use the larger cucumbers for pickling, but we might just end up with lots of salad fixings!

Lettuce. Not much to say about it except it'll be nice to have on hand to make salads. You know, to use up all those cucumbers!

Squashes. We're planting yellow summer squash, grey zuccini, patty pan, and miniature pumpkins. These take up a lot of room, but we love eating squash (and mini-pumpkins are just fun!) so it's worth it.


The strawberry patch still needs a bit of work!
Strawberries. My mom has extra plants she's going to give us to get started here; hopefully they thrive. Fresh ripe strawberries are marvelous. Also, a strawberry bed to the side of the patio will look much nicer than the current crop of dandelions.

Blueberries - still alive!
Blueberries. We've had these for three years now, and somehow didn't kill them. The first year, they stayed on our front porch in the bags they were purchased in. The next, they got moved into old cat-litter buckets. We upgraded them into a rubbermaid bin this year; we'd plant them permanently, but we're renting and don't want to have to leave them behind. We haven't gotten any berries from them yet, but this year we hope to get a few.

Techniques:
The square foot grid laid out and ready to plant
We're mostly using the square-foot gardening plan from this book. Basically, it calls for dividing the garden up into one-foot squares (hence the fashionable yellow yarn in our garden!) and planting each seed to maximum density within a square. This helps get the most out of the garden and eliminate much of the need for weeding, as the vegetables grow more closely together and don't leave room for weeds. I like this a lot, because I loathe weeding. There is nothing fun about it, and it never seems to end. Reducing the need to weed is a big benefit to any garden plan!

I'm sure that we will have plenty of learning-curve experiences throughout the year, including plenty of mis-steps as we miss deadlines for planting/harvesting as we try to juggle a garden, a toddler, and a newborn. It should be fun, though!

Next week: Jam! Because really, who doesn't love jam?

This post is linked to Made From Scratch Mondays at The Daily Dish

Sunday, April 22, 2012

Broke Doesn't Mean Boring: Decorating a Nursery on the Cheap


Last weekend, Randy and I finally put the last touches on Parker's room. Considering he's due in two weeks, I'd say it was about time! Being on a tight budget, we didn't have much cash to spend, so we had to figure out how to furnish and decorate it on the cheap. All told, we spent less than $100. Looking back, we realized that we spend about that amount on Zoey's nursery also.

Considering how much people can spend on nurseries, we feel that we did pretty well. If you go into any store that sells baby furniture – cribs, dressers, rocking chairs, etc. Any one item can set you back hundreds of dollars. It's ridiculous.

Especially when you consider all the free – or nearly free – stuff out there. Because really, once anyone's kid has outgrown their swing, bouncer, crib, etc., the main goal seems to be to get rid of it quickly so it stops taking up room in their house; after all, most kids just accumulate more and more and more things. 

Here's how we furnished the rooms:

Crib
Zoey's crib, converted to a toddler bed
We didn't have to pay for a crib for either child. For Zoey, we got one from my sister, who had kept the crib she bought for her daughter and had recently come to the decision to not have more children. It is a convertible crib/toddler bed; Zoey is now using it in toddler bed form.

Parker's Crib
For Parker, we got a crib off of freecycle.org. Between Freecycle and Craigslist, you can find almost everything baby-related for free or next-to-free. Both these free cribs were sturdy and in good condition.

                                     Rocking Chair
I believe a rocking/gliding chair is important for those late night please-dear-lord-go-to-sleep sessions, as well as for feeding. That doesn't mean I want to pay a month's rent for one. Rocking chairs – or the modern favorite “gliding” chair sell for a LOT of money. When we were shopping for Zoey, we saw chairs from $300-$1,000. And they didn't even give massages. We got ours from Craigslist for a whopping $10. It's a basic rocking chair that gets the job done.

Dresser
This is another essential. Not only does it perform the basic function of holding clothes, it provides the best place to put a changing station (unless you're rich enough to buy a separate changing table for $100-$200). We got a contoured changing pad (that you need for the top of a changing table anyway) from a friend who was off-loading baby equipment and put it on top of the dresser.

Zoey's re-fabbed dresser
The problem with dressers is that people so rarely get rid of them. After all, unless they're in really bad shape, they still hold clothes just fine. Heck, I still use the dresser I had when I was 10. So does my sister. With Zoey, this wasn't a problem, as we had an extra dresser that came with our house. It was dark, ugly wood, but Randy stripped off the stain and painted it to match the room.

Dressers appear on Craigslist and Freecycle occasionally, but unless you are sitting and watching constantly so you can be sure of being the first responder, your odds of getting one are low. We attempted to get a half-dozen or so – a couple of times replying less than an hour after the ad was posted – and got beat out for all of them. If you live in a metropolitan area, it's easier because there are more dense postings, but it didn't make sense for us to drive 70 miles each way for a free dresser.
It's modern.  For the '80s....

That meant we had to go out and buy one. Our budget meant we were limited to a chintzy press board chest of drawers from a store like Target, or second-hand shops. We finally found a dresser at Goodwill for the bargain price of $40. That's the most we spent on any one item for either nursery. It isn't the most attractive dresser – black lacquer and gold trim – but it's sturdy, and has enough room to hold not only clothes for the first six months, but also all of the cloth diapers and accoutrements.


Decor
We spent a bit more on decor for Zoey's room than for Parker's, mainly because we painted Zoey's room. Randy painted the walls a pale yellow and the ceiling a pale pink. We used the same paint on her dresser. Now that we're in a rental, we didn't want to pain the walls, so we didn't have that expense.  If we weren't renting, we'd have painted the walls again - for a relatively small expense, it really makes the room look more coordinated. 

For both Zoey and Parker, we wanted to put their names on the wall, so we got craft letters from JoAnns ($2/letter) and painted them, then hung them over the crib. Unless you name your child Evangelica or something equally long, this is a cheap but nice decor.

If we had any artistic skill whatsoever, we would have painted the walls rather than buying art...but we don't. We originally had flower decals on the wall for Zoey (a package at Target runs around $10) and that was it. Then Randy's sister Megan – who DOES have artistic skill – painted some pictures that we hung instead.

For Parker, we decided to craft it. We wanted to decorate with a dinosaurs. Again, our lack of artistic ability combined with our lack of money limited our funds. We decided to make our own wall art by making frames from frames from 1”x2” lumber ($2/8 foot board) and stretching dinosaur-patterned fabric across them. We had a little snag in our plans when we realized that apparently dinosaurs are not in style any more, so there's not much in the way of dino cloth. We did manage to find a couple of prints we liked, and went to town.

While we were at it, we found this neat United States map print for Zoey's room. We spent about $15 total on cloth and another $15 or so on the wood – not too bad.

We got Zoey's curtains at Target for about $15 – they had some with an extra-thick backing to block out light (in both houses, we gave her a room with a western exposure). Randy's sister made the curtains for Parker's room.

Swing/Bouncer/Floor Gym/Playpen/Diaper Genie/Hamper
All of these, we got for free from a friend who was off-loading baby gear or for our baby shower for Zoey. When Parker is done with them, we'll pass them on to someone else for free. Considering the extremely short time they are used, any free version you find will likely be in excellent condition.

Clothes
We got two years' worth of clothes for Zoey (so many, in fact, that she never wore some of them!) and one year's worth or so for Parker for free. Just like baby-related furniture, people want mainly to get rid of the extra clothes taking up room – and especially for the first year or two, kids wear clothes for such a short period of time that many of the clothes are in new or near-new condition.

High Chair
Ok, this isn't for the nursery, but you'll need one eventually. There are tons of chairs out there with various add-ons. They can get quite large, not to mention expensive. We originally got one for free from my sister, but found that it wasn't much good when we left the house, since it wouldn't fit in the trunk of my car. The answer – a $30 bare-bones chair from Ikea. It's a simple molded plastic seat with four straight metal legs that snap in and a tray. Easy to clean, easy to transport, and space-efficient.

We also saved a lot of money with Zoey by making our own baby food and freezing it – I'm sure I'll make a post about that when I start doing it for Parker. We're going a step further in savings this time by trying cloth diapers – now that we have a good washer/dryer, it makes sense and doesn't seem to be that much more work than disposables. I'm confident that you'll get an update on that, as well!

All in all, we discovered that – with the notable exception of a dresser – just about everything essential for babies is easy to find for free or next-to-free. If you aren't the first in your family/friend group to start having kids, you'll probably have most of what you need given to you before you even think to ask.  Otherwise, your Craigslist and Freecycle will supply a plethora of options.

If we had to start over this time, I'd have started the dresser search as soon as I knew I was pregnant, rather than just looking intermittently. Free/cheap dressers do exist, but they get snatched up quickly; this makes sense when you consider the price of a new dresser (easily $300 or more). How much you want to spend on decor is up to you, but by doing a little more work yourself, you can decorate the room for less than $50 even without purchasing from thrift stores.

Sunday, April 15, 2012

Better Late Than Never: Egg Rolls!


April Stock-up: Egg Rolls!

I know I've missed a couple of weeks. This was due to a combination of not getting a photo of a cooked egg roll (the horror!) and wanting to wait for that, and just plain forgetting. Also, Zoey learned how to climb out of her crib and we had to transition to a toddler bed, which meant that none of us got much sleep for a week or so. And I got lazy – probably due to eating way too many egg rolls!  Here it is, better late than never (and here I am, vowing to not skip posting any more because it's too easy to get out of the habit!)

We've only done a couple of intentional stock-ups so far – turkey bratwursts and peirogis – but we're already seeing some savings in our grocery bill. Last month, we only used about 2/3 of the meat we bought because we filled in some gaps with food from our stock. That meant that this month, we could get a London broil, cheap steaks, the materials for egg rolls and a turkey for future bratwurst-making in addition to our usual meat selections and still come in on budget for our shopping trip. Also, it saved us from ordering pizza during conference week (admittedly, I'm conflicted about this as a benefit; yes, it was cheaper and healthier to eat brats and peirogis, but I love pizza and we have a fantastic pizza place less than a mile away).

However, anything gets old if you have it too often, so in the interest of building variety in our stockpile, so we are sticking with our decision to try and stock up on a different item each month. This month, it's egg rolls. Since childhood, I've loved egg rolls. I thought I had a perfect opportunity to learn how to make them in college – my best friend is Korean and her mom agreed to teach me. Unfortunately, when I got to her house, she had already made the filling and had it all set up to wrap. When I asked how to make the filling, she said “it's meat, vegetables, and seasonings”. Not the most helpful answer, but accurate.

A couple of summers ago, I came upon this recipe and decided to go for it, but with different wrappers – we had white people problems figuring out the wrappers we first bought. The wrappers I use are smaller, but easier to find at a general grocery store; every major chain seems to carry them. The benefit to this is it makes more egg rolls. The downside to this is also that it makes more egg rolls.


To give you a perspective, here's the pile of filling from our first egg roll experience, with Zoey (four months old at the time) for a size comparison.

As you can see, this is not a project you want to undertake on your own, unless you have a 10-year-old's level of energy and a strong love for repetitive tasks. The prep work is pretty easy, but rolling a trillion and a half egg rolls gets old in a hurry.

Too big is better than too small - trust me!
Before you start, make sure you have a large container for the filling – or a nice flat surface area that you can mix all the filling on. We started by using our biggest bowl, but it didn't quite do the trick. Luckily, Randy has a 10-gallon fermenter, which was large enough and then some. A large stock pot would probably do the trick, but isn't as fun as overkill. You will also want an old pillowcase to wring out the veggies after they sit in salt to draw the moisture out. You can do this step without a pillowcase, but it takes longer.

Before you begin to roll, make sure you have a nice assembly area prepared – the process will take long enough as it is, and your hands will be goopy, so you don't want to have to go looking for things. You'll want 2-3 large platters or cookie sheets to stack the finished rolls on, your packs of wrappers, a small bowl of water for each person to use to seal the rolls, and your container/mound of egg rolls. Plus a beverage in a container you don't mind getting gooped.
Our assembly station - we stood on opposite sides of the counter
and it went much more quickly than we anticipated!

Time-wise, plan about 20-30 minutes for prep, an hour to let the veggies sit and salt , and 30-60 minutes or so to roll, depending on how many people you have and how quickly you can roll. Then you can cook some and put the rest in the freezer for a few hours before packaging.

After learning my lesson from the peirogis (some of them weren't quite frozen when I packaged them, and stuck together during cooking – the flavor still rocked, but they looked like a science experiment gone wrong and a couple of them popped open in the water when I tried to separate them), I made sure to leave the egg rolls in the freezer until they were thoroughly frozen to prevent them from sticking together. In the past, we have also used waxed paper/tin foil to separate them, which worked just fine.

You can freeze these either cooked or uncooked; this time I opted for uncooked because it lessens the time commitment considerably if you don't have to wrap AND fry ten billion egg rolls. Also, I prefer these freshly fried, so freezing them uncooked makes more sense. To cook, just put in the hot oil frozen – I found this works best both for maximum crispiness and because the egg rolls have a tendency to adhere to the packaging as they thaw, which opens holes. If you want to cook then freeze, I find that baking them works well to re-crisp the wrappers without adding more oil.

The final product!  These were fried after being frozen and cooperated
quite nicely - they didn't splatter overly much and still got crisp, just took a little longer to cook
This made about 100 egg rolls. We froze them in packs of five, so we have enough egg rolls to last for many, many meals. Because I can't fathom the thought of egg rolls without sweet and sour sauce, but ALSO can't justify buying bottle after bottle of the stuff, I made my own using this recipe.  It turned out decently, although a little less tangy than the store-bought brand. For the savings, its' definitely a worthy substitute.

As far as costs go, these aren't ridiculously cheap like peirogis, but the cost-per-meal is low. We spent just under $40 on ingredients, including sweet and sour sauce to eat them with, with the largest costs coming from the wrappers ($10 for six packages) and the beef (around $10). Per-meal, this turned out to be about $2 – not so bad! Add some fried rice and there's no need to order Chinese food!

 RECIPES:
EGG ROLLS
2.5-3 lbs of ground beef, cooked through and drained off all fat.
12 oz salad shrimp, thawed and drained. You can omit or use larger shrimp chopped coarsely.
1 medium head white cabbage, shredded
2 medium napa cabbages shredded
5-6 carrots julienned
3 medium onions julienned
1lb Korean sweet potato starch noodles or rice noodles, prepared according to package instructions, drained and cut into 2 inch lengths with kitchen shears
1 cup or more of oyster sauce
3 eggs beaten lightly
1 cup or more of plain breadcrumbs
salt
pepper

90-100 egg roll wrappers, thawed if frozen - this equals 6 packs of the square wrappers found in most grocery stores

In a very large mixing bowl combine cabbages, carrots and onions and sprinkle with a couple of teaspoons of plain table salt.

Let sit for 30-60 minutes to allow the salt to penetrate the vegetables to release excess liquid. Rinse thoroughly and drain.

While veggies are salting, brown the beef and cook/chop noodles

Wring out all possible moisture (important for preserving the quality of the final product) by putting 1/3 of the vegetables at a time in an old pillowcase or (in smaller batches in a kitchen towel and twisting it until tight.

Add remaining ingredients and mix until well-combined.

Add approximately 1/4 cup of filling to each wrapper and wrap according to package directions.

To cook, heat about half an inch of vegetable oil in a skillet over a medium hot burner (6 or 7 on the dial). When the oil is hot (I test by throwing a drop of water in and seeing if it pops quickly - so scientific!) put 5-6 egg rolls in seam side down and fry until golden brown and then flip and fry the other side. Drain well on paper towels.

Serve hot

To Freeze, flash freeze by layering on a cookie sheet (separate layers with parchment paper or wax paper) with egg rolls NOT TOUCHING each other for a couple of hours, or until rolls are frozen hard, then package in ziplocs or food saver bags.   You can skip flash freezing if you separate the rolls with wax or parchment paper prior to freezing them, but I find the flash-freeze method easier and more reliable.

To cook from frozen, add frozen rolls to hot oil.  Follow cooking directions above.


SWEET AND SOUR SAUCE
1 small can pineapple juice (or juice from a 15-1/4 oz. can pineapple chunks, drained)
1 1/2 tablespoons cornstarch
1/4 cup ketchup
1/4 cup brown sugar
1/4 cup vinegar
1/2 teaspoon granulated garlic
1/4 teaspoon mustard powder
1 tablespoon Worcestershire sauce (or less)
1/2 teaspoon ground ginger

Make a thin slurry with the cornstarch and a small amount of the pineapple juice (1/4 cup or so).  You want the cornstarch to be fully dissolved before you add it to the rest of the ingredients.

Add the cornstarch slurry to the rest of the ingredients in a small saucepan.

Heat over medium heat until sauce is desired thickness.


Next week: decorating a nursery on the cheap! 

Linked to This Week's Cravings at The Daily Dish