Monday, June 18, 2012

Fried Rice - In 30 Minutes, You'll Want It Again!


Big bowl of yum

One of our favorite ways to stretch leftovers is with fried rice. When I first made this several years ago, Randy was skeptical. Fried rice should be left to restaurants, he thought. I soon converted him, to the point that he now suggests I make it even when we have no leftovers to use in it.

Leftover BBQ works perfectly. 
I like cooking this because it is so versatile and uses a little bit of whatever I have on hand, rather than sticking to a strict recipe. I've made it with leftover teriyaki, barbecue, even meat cooked in mushroom soup. I usually include eggs, but it's good without. Fresh veggies and frozen both work well (and again, you can choose to include pretty much whatever vegetable you want). I also like it because I get to eat fried rice when I'm done!

While I don't stress about having the exact right ingredients to make fried rice, I have found some seasonings make a big difference. The main one? Fish sauce. It surprised me when I first discovered it – I don't even remember why I decided to put it in. Probably because I had a bottle of it in the cupboard forever and thought something along the lines of “Fish sauce and fried rice are both Chinese* Therefore, they should be good together.” And they were, therefore proving the infallibility of my logic.

If you are missing some of the seasonings, you can always just mess around with what you have on hand. At one point or another, I have made this successfully while missing one or more of the seasonings, and I change it slightly each time I make it – the different result each time is one of the joys of making fried rice. This works because with fried rice, the technique is as important as the ingredients. As with most recipes, patience is the key when making fried rice. If you rush it, you end up with a dish that tastes like fried rice, but has the wrong texture. Patience plays into texture in two ways.

See how the grains are separate? Hard to do with fresh, hot rice.
First, fried rice is best when made with leftover rice. Whenever we have rice for dinner, I make a full 6-cup rice-cooker full, even though we never eat that much. That way, we can have fried rice the next day. Day-old rice works better than freshly cooked because it dries out a little, and the grains separate more easily.

If, like me, you sometimes forget to make rice ahead of time (or forget to put the rice in the fridge overnight and end up tossing it) you can still achieve this effect to a lesser extent by cooking your rice a couple of hours ahead of time, then separating it as much as possible and putting it in the fridge. If you have room, spread it out on a cookie sheet; if not, use the widest dish you can – you want to increase the surface area as much as you can. This might seem like a petty step, but it really does make a difference.

Look at all that goodness!
The other time that patience comes into play is during the cooking. You want to be sure to let the rice cook long enough so the flavors blend and so the rice gets the right fried texture. I'm not a patient person by nature, so I have to distract myself with cleaning or something similar to prevent myself from messing with the rice too much or getting bored and deciding it's done prematurely.

Other than that, the main effort involved is in prep – chopping up the meat into small pieces, scrambling eggs, cutting veggies (if using fresh), etc. Once all the chopping is done, it's mostly a matter of waiting for the rice to fry up to the right consistency.

In the recipe below, all measurements are of the “ish” nature – I more or less just dump things in on top of the rice in the wok and then adjust if it tastes off. I did measure the oil the last time I made it because that's a delicate balance – you want enough to coat the rice and let it fry, but not so much that the end product is greasy.
Taking pictures prevents me from eating it too soon!

We make this as our full dinner, but it can easily be made as part of a Chinese food feast with some egg rolls and sweet and sour pork (recipe forthcoming!). It holds up well as leftovers, and I often will have it for lunch the following day.

*Wikipedia informs me that fish sauce is actually used more in Vietnamese and Thai cooking. It is used in some parts of China, though, so I wasn't totally ignorant and wrong. Just mostly.

RECIPE
2 cups leftover meat
4 eggs
1-2 cups vegetables
4-8 cups cooked white rice
4 T vegetable oil
2 t sesame oil
2 T fish sauce
2 T rice vinegar
2 T soy sauce
2 T teriyaki sauce
1 t 5-spice
1 t ground mustard
½ t ground ginger

*Dice meat into small (¼ – ½”) cubes
*Scramble eggs and set aside
*Dice up vegetables into small (¼ – ½”) cubes
*Heat vegetable oil and sesame oil in wok or large frying pan over medium high heat until a piece of rice sizzles when it's dropped in
*Add rice to oil and stir well to coat with oil. Let fry, stirring occasionally for 4-5 minutes
*Add fish sauce, rice vinegar, soy sauce, teriyaki sauce, 5-spice powder, mustard, and ginger. Mix well to evenly season the rice.
*Cook, stirring occasionally for 10-15 minutes.
*Add meat, vegetables, and eggs, and mix well.
*Cook, stirring occasionally, until the meat and vegetable are hot (5-10 minutes)

Linked to This Week's Cravings at The Daily Dish

Sunday, June 10, 2012

Sourdough...Cookies?


I think I'm starting to get the hang of this sourdough thing. Making a loaf or two every week has helped, as did all the tips I got from people who have much more experience than I do! One thing I figured out early on is that I have to be patient – giving it more time really makes a big difference in the end product.

I also figured out some techniques to increase the sour flavor. The one I settled on was to use a little bit of rye flour in the starter. Some people also use citric acid, but to me that seems like cheating. I'm not sure why one added ingredient is legitimate in my mind and the other is cheating, but there you go. There are plenty of other things I want to try to improve the basic recipe, but I have to be patient and get some more ingredients. Luckily, I'm on break until September, so I have lots of time to play with it! I've put my updated recipe at the bottom of the post.

See those bubbles?  That's an active starter!
Now that I have the basics down, I thought I'd look around and see what else I can use my starter for, despite Randy's plaint of “Why does everything have to be sourdough?” I love sourdough and will make ALL THE THINGS  out of it!

Luckily for me (not so much for Randy), it appears that you can use sourdough starter in pretty much everything you bake. Some things are just variations of other recipes that I like – whole-grain sourdough bread and sourdough English muffins. Many of the other recipes I found made a lot of sense – things that regularly call for sour cream or buttermilk like pancakes or coffee cake.

One, though, made me scratch my head. Sourdough sugar cookies. Um...what? That just doesn't compute. However, there are dozens of recipes out there, so they must be decent. Of course I had to try it!

I figured it it was win-win – either I they would turn out delicious and I'd have a tasty treat...or they'd be unappetizing and I'd avoid stuffing my face with cookies.


I fed my starter – but only once instead of twice, since the rise wasn't as important (and the recipe called for baking powder and baking soda, and eggs which act as leaveners as well). It got nice and poofy – I've fed it a lot in the past couple of weeks as we are re-building our bread stock, so it's nice and active.

Many people talked about adding different ingredients into the base recipe (due to trying to make them edible, Randy would say), so I thought I'd experiment with several variations in the same batch. Some, I left plain, some I topped snickerdoodle style with cinnamon and sugar, and some I put dried cranberries in.

The dough was very soft and I worried that they would spread a lot, but they kept a very nice shape. They came out very light – the lightest cookies I've ever made. I was, at first, unimpressed with the flavor of the plain cookie; it wasn't bad, it was just a bit blah. These are not very sweet cookies. However, it left a pleasant, lingering taste in my mouth.

The cookies with added flavor were better. The snickerdoodle flavored variety tasted, well, like snickerdoodles, but with a lighter texture. The real winner, though, was the cranberry cookie. They tasted very similar to scones. If I make these again, I will add cranberries to the entire batch.
Look at that poofy texture!

Overall, I am calling this experiment a success. The biggest evidence of success was that Randy – who
didn't even want to try them – couldn't stop eating them.

RECIPE (Total Cost: $1.24)
½ cup butter, softened ($0.63)
1 cup white sugar ($0.26)
1 egg ($0.12)
1 cup sourdough starter
1 ¾ cups all-purpose flour ($0.14)
2 tsp baking powder ($0.01)
1 tsp salt
1 tsp vanilla extract ($0.08)
¼ tsp baking soda (< $0.01)

*Preheat oven to 350 degrees F (175 degrees C). Lightly grease or line a baking sheet with parchment paper.

*In a large bowl, cream the butter with the sugar.
*Beat in the egg and sourdough starter.
*Stir in remaining ingredients and beat until smooth.
*Drop dough by teaspoonfuls onto prepared baking sheets
*Bake at 350 degrees for 10-12 minutes


UPDATED SOURDOUGH BREAD RECIPE
To keep the starter alive, feed it every couple of weeks or so - remove one cup of starter and replace with 3/4 c flour* & 1/2 c water, mixing in.  (If it has separated, just stir it back together).

To make the bread:
1 cup starter
5 1/2 c flour
1 1/2 c water
1T salt
optional: 2T wheat bran (helps rise and be less dense)

The day before baking: Feed the starter at least twice, leaving it out on the counter. You want to get it super active; this helps it rise farther and faster. I was skeptical, but it makes quite a big difference.

The night before you bake the bread, combine starter, water, and 2 1/2 cups of the flour.  Mix until smooth, then cover and let sit out until the morning. Feed the remaining starter as described above and put it back in the fridge.

In the morning, add in the salt and remaining flour to make a dough.**
Let rest 10 minutes
Knead 10 minutes

Let rise until doubled.  This takes about 3 hours at my house, but yours is usually a bit warmer, so may take less time for you.
Shape into loaves and let rise until doubled again.  This takes about six hours for me, but again, may take less for you.  I usually start checking after three hours or so
Bake @ 400 for 55-60 minutes

*You get a better sour flavor if you replace 2T of the flour with rye flour, but it's completely optional.  Also, these measurements are customizable - if it gets stiffer than you want, up the water; if you seem to be losing starter, put more flour/water in.

**I've noticed that SD dough tends to be a bit wetter than other dough.  This is especially notable when kneading (it holds form and kneads well, but has a tendency towards getting sticky) and after the first rise, it'll need a dusting of flour.  I usually dust it lightly with flour AND grease the bowl lightly when it's rising to keep the sticking issues down.

Sunday, June 3, 2012

English Muffins - Buttered Bliss


Why?  Because breakfast doesn't get any better than this.
The lower element for our oven finally came in this week. To celebrate...I decided to make English muffins. Which don't need the oven to cook. I didn't think of it last week, when I wanted a sandwich but had no bread – I was too focused on tortillas – especially after the wonderful and generous Page G gave us a tortilla press! Now, when I can make actual bread, I decide that English muffins would be better.

I'm logical like that.

There are two basic variations of English muffin recipes. One calls for making a batter, pouring it into rings, then cooking on a griddle or skillet. The other has a stiffer dough that gets rolled out, and the muffins are cut out like biscuits. The second method also usually calls for cooking on a griddle or skillet, although the odd recipe or two says to bake them.

Batter, pre-proofing.  I had to resist adding more flour.
I decided to go with the batter method, mostly because I made them once a couple of years ago and they turned out well. I'm not sure why I haven't made them again since then, but I can guarantee it won't be another two years before the next time. It probably won't be two days, honestly.

I used Alton Brown's recipe with the slight adjustment of using lard instead of shortening. Why lard? After last week's experiments in tortilla making, the feedback was overwhelmingly in favor of lard over shortening so we bought lard instead of shortening on our monthly shopping trip.

Turns out lard makes excellent tortillas – much lighter than oil. It worked out pretty well in the English muffins as well.


"Custom" muffin rings.  AKA wide-mouth canning rings
Like tortillas, English muffins are so easy to make that I don't know why I haven't been making them forever. The total time invested was less than an hour, half of which was waiting for the dough to proof. Once the dough was proofed, I was able to make the rest of breakfast while the muffins cooked.

Hot, fresh, English muffins for breakfast? Yes, please.

I had a little difficulty with covering the muffins as they cooked – mostly not thinking about the broiler pan I used touching the dough and messing it up. This is easily solved, however, by putting the rings closer together and/or putting something slightly taller on the griddle for the pan to rest on.

I went an extra step and toasted the muffins before eating them. I can't imagine eating an un-toasted English muffin – the extra level of crispiness is essential to the experience.

Halfway there
The other change I made was largely an excuse to play with my new digital scale; I decided to weigh the flour instead of measuring it by volume. Supposedly, it's the only way to go, since it will always be accurate, whereas volume measurements can vary based on sifted v. non-sifted, accuracy of leveling, etc. Some people insist measuring by weight is vital to properly executing any recipe.

I'm not entirely convinced – after all, I've successfully made oodles of things without weighing my ingredients – but I will admit I like the idea of accuracy. Also, I want to start putting actual cost comparisons up with the recipes that are more than just a guesstimate. Since most of the ingredients give a weight-based price, it makes sense to weigh out how much I use.

Of course, I didn't weigh all the ingredients for this, the first attempt. In my defense, I made these first thing in the morning and wasn't fully caffeinated yet. Also, some ingredients I don't have price variants for. I will get better, I promise. I'm making a spreadsheet and everything. Organization. I can learn.

Based on the prices I do know (everything except sugar and salt), I can safely say this recipe costs less than one dollar to make. It probably comes in under fifty cents (I can't imagine the cost of the sugar and salt combined are much more than 10 cents, considering how little the other ingredients cost).

I may have had trouble waiting...
Considering the output – eight English muffins – the per-unit cost is somewhere less than $0.13. Costco's best price is $4.33 for 12 muffins, or $0.36 each. While 36 cents doesn't seem like an outrageous price, who doesn't like getting something for 1/3 of the price? There's also – as always – the bonus of ingredient control.

  These turned out wonderfully, with all the nooks and crannies you could hope for, just waiting for butter to melt into them and jam to seal them off.  I may or may not have eaten more than one before I let Randy know breakfast was ready. This probably off-set the health benefit of making my own.  I'll just have to make them more often so the novelty wears off and I can resist temptation better.

Beautiful.
RECIPE
  • 1 cup warm milk ($0.19)
  • 1 tablespoon sugar
  • 1 teaspoon salt (divided)
  • 1 tablespoon lard ($0.05 max – guessed on weight)
  • 1 envelope (7 grams) dry yeast ($0.04)
  • 1/8 teaspoon sugar
  • 1/3 cup warm water
  • 2 cups (250 grams) all-purpose flour, sifted ($0.16)
  • Non-stick vegetable spray
  • Special equipment: electric griddle, 3-inch metal rings (or wide-mouth canning rings)
Total known cost: $0.44. Total estimated cost: $0.60.
In a bowl combine the milk, 1 tablespoon of sugar, 1/2 teaspoon of salt, and lard. Stir until the sugar and salt are dissolved. In a separate bowl combine the yeast and 1/8 teaspoon of sugar in 1/3 cup of warm water and rest until yeast starts to bubble. Add this to the milk mixture. Add the flour and beat thoroughly with wooden spoon. Cover the bowl and let it rest in a warm spot for 30 minutes.
Preheat the griddle to 300 degrees F. This equates to medium or medium-low on your stove top – 4 or 5 on the dial.
Add the remaining 1/2 teaspoon of salt to mixture and beat thoroughly. Place metal rings onto the griddle and coat lightly with vegetable spray. Equally divide the batter into eight rings. Cook for 6 minutes. Remove the lid and flip rings using tongs. Cover with the lid and cook for another 6 minutes or until golden brown. Place on a cooling rack, remove rings and cool. Split with fork and serve.
.
Linked to This Week's Cravings via the Daily Dish

<a href="http://dailydishrecipes.com/" target="_blank "><img src="http://i1112.photobucket.com/albums/k498/Hudgens6/Buttons/ThisWeeksCravingsButton.jpg" class="ov-done" /></a>

Saturday, May 26, 2012

Taking on Tortillas


I've wanted to try my hand at making tortillas for a while, but I've heard that to make a really good tortilla, you have to learn from someone who grew up making them. Randy wanted to hold out for a tortilla press so he didn't have to roll each tortilla out.

Tortillas now and no-one gets hurt!
And so we thought about it, talked about it, said how nice it would be, but never actually attempted making any.

Then the lower element in our oven blew out and the replacement element got back ordered. Two weeks later, we were out of bread, out of tortillas, and still a week away from grocery shopping. At that point, we decided we might as well try our hand at it, especially because Zoey – for some unknown reason – had decided that tortillas were her favorite food and kept asking for some.

I was tied down with Parker, the hungriest baby on the block, so Randy stepped up to the task.
Dreaming about his next meal

The first batch came out OK, but not great – we cooked them on the electric skillet and kind of winged it temperature-wise. The result was tortillas that were a little too stiff and a bit crispy, but that still only had light browning. Luckily, they are easy enough to make that we decided to try again.

The basic recipe is simple:
2 cups all-purpose flour, ½ tsp salt, ¼ c oil, and 2/3 c warm water. Four ingredients. Total. Simplicity at its finest.

For contrast, here's the ingredient list for Mission brand tortillas.
Enriched Bleached Wheat Flour (Wheat Flour, Niacin, Reduced Iron, Thiamine Mononitrate, Riboflavin, Folic Acid), Water, Vegetable Shortening (Interesterified Soybean Oil, Hydrogenated Soybean Oil and/or Palm Oil), contains 2% or less of each of the following: Salt, Leavening (Sodium Bicarbonate, Sodium Aluminum Sulfate, Corn Starch, Monocalcium Phosphate and/or Sodium Acid Pyrophosphate, Calcium Sulfate), Distilled Monoglycerides, Enzymes, Wheat Starch, Calcium Carbonate, Antioxidants (Tocopherols, Ascorbic Acid), Cellulose Gum, Dough Conditioners (Fumaric Acid, Sodium Metabisulfite), Preservatives (Calcium Propionate, Sorbic Acid and/or Citric Acid).

I don't see the resemblance, personally
I will take the four-ingredient list and fresh flavor/texture over store bought, especially now that I know how easy they are to make! The texture is better, too – it's light and slightly chewy, compared to the relatively dense versions you can buy. Of course, mine don't have the nice round shape they're supposed to – Randy keeps comparing them to the Millennium Falcon – but they still taste fine! His, of course, come out nearly perfectly round, the fink. If we had a press, I could make round torts too. Probably. If someone wants to buy me a press, I'd be glad to test the theory!

Randy tried to improvise a press
Surprisingly, these are not healthier, calorie-wise, than the commercial tortillas. They run about 60 calories/tort higher. However, the absence of preservatives and additives tips the balance back in favor of homemade, at least in my book. Also, the homemade version has about half the sodium as the store bought. You can save some calories (about 15/tort) by using shortening rather than vegetable oil (vegetable oil is about 40 calories less per tort than canola oil. Olive oil doesn't work very well with these) and in fact, many recipes call for shortening rather than oil. I used oil because, well, we don't have any shortening.

Extra calories aside, these tortillas are worth the effort because of the freshness and flavor. They also cost much less to make than to buy – and you can customize the flavors however you wish. If you've ever bought flavored tortillas – even just whole-wheat – you know that any deviation from the basic flour drastically increases the price...and rarely will you find anything other than whole-wheat, tomato, or spinach. At home, however, the opportunities are endless.

I decided to play around and try some flavors I hadn't seen before. I made three batches of flavored tortillas: jalapeno/cilantro, garlic/rosemary, and honey/wheat. All three flavors came out well although the whole-wheat wasn't as exciting.

Left to right: Jalapeno, Wheat, Garlic
Even cooking three batches only takes minutes, and I was left with extras to freeze. In my two-minute google search for how to freeze fresh tortillas, I found that rolling them out and freezing them uncooked is the worst way to go – they don't cook up as well. Either freeze the dough in balls and defrost/roll out when you want to cook them, or cook them, then freeze. I opted to cook them first, just because I already had the production line going.
About 10 seconds after hitting the pan
Flipped and done


RECIPE
Basic Flour Tortilla
2 c all-purpose flour
½ tsp salt
¼ c oil
2/3 c warm water

Mix all ingredients until they form a soft dough.
Knead for five minutes or until dough becomes elastic
Let rest under a kitchen towel or plastic wrap for 15-30 minutes
Separate dough into 6 equal balls
Heat a skillet on high until smoking hot
Roll each ball out to approximately 8 inches in diameter
Stack, separated by foil or wax paper until ready to cook.
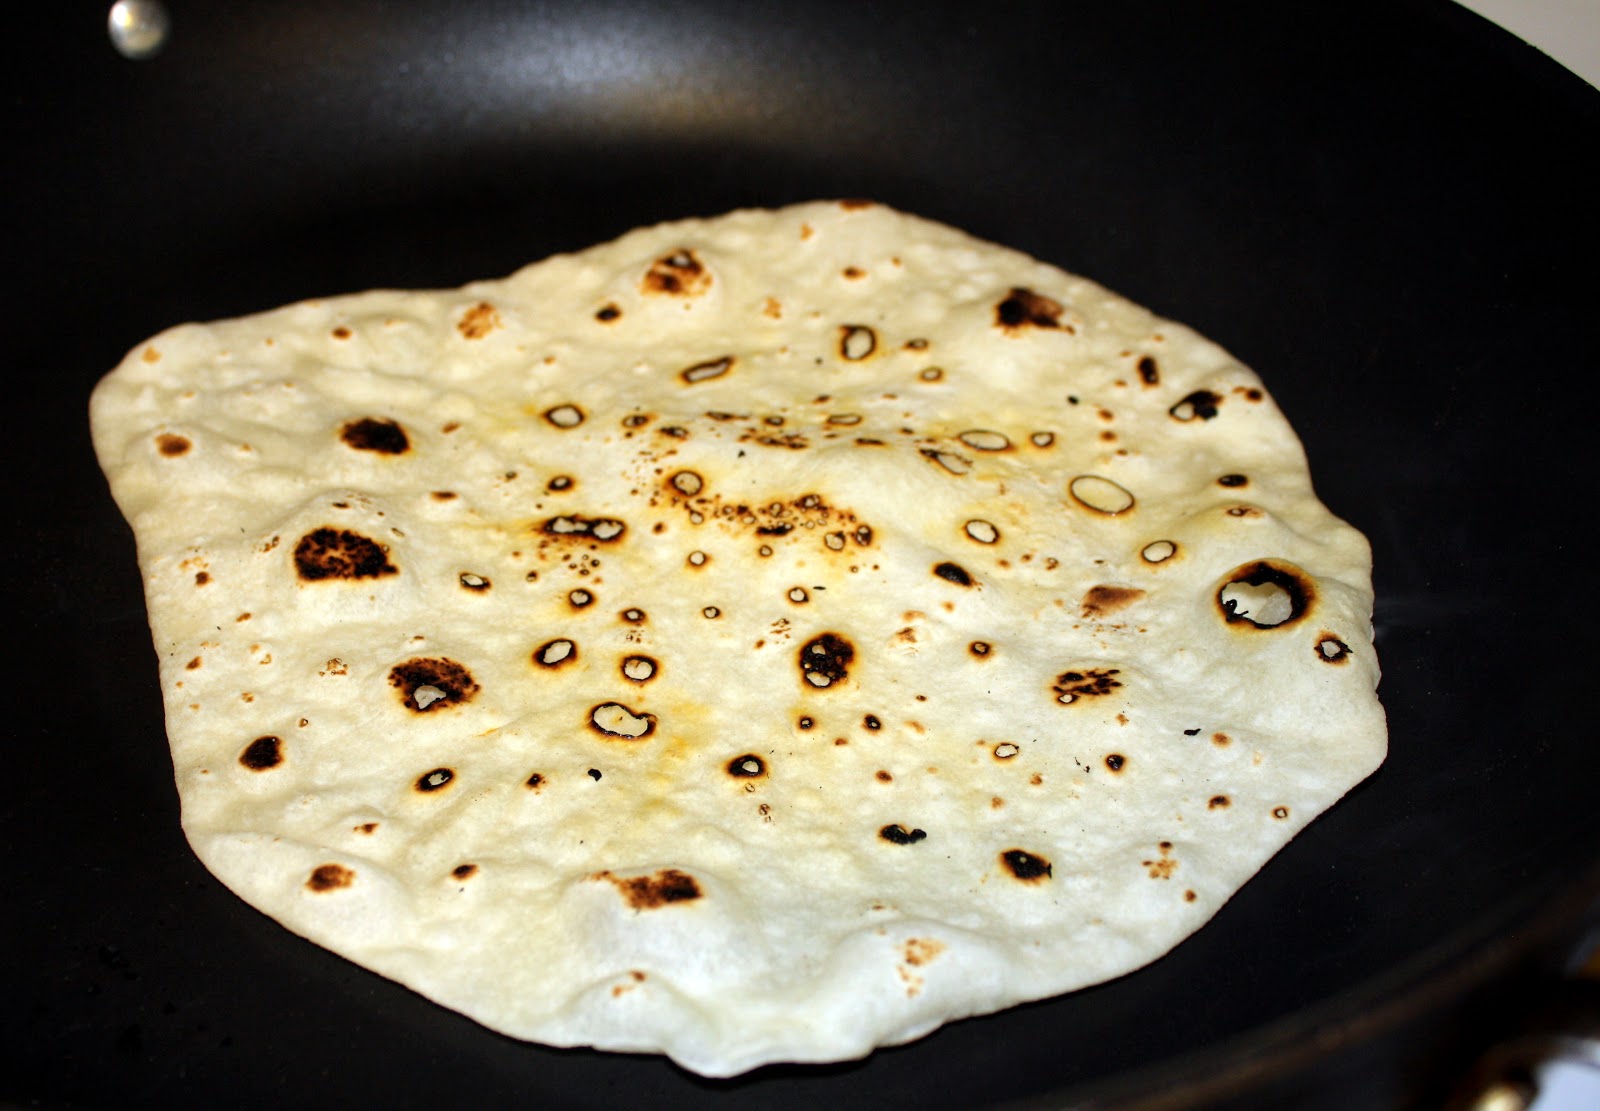
Cook one at a time for 10-20 seconds per side. The tortilla should puff up when it's ready to flip and should have dark brown spots on it.
Stack the cooked tortillas on a plate and cover with a damp towel.
See the steam?  That helps give them the nice chewy texture

FLAVOR VARIATIONS
Jalapeno/Cilantro*
Add ¼ finely minced nacho jalapenos and 1T dried cilantro to dough. You will likely need to add a bit more flour (up to ½ cup) to counter the extra moisture in the jalapenos. It is important to get a fine mince on the jalapeno, as the tortillas have a tendency to tear near larger pieces. Also, don't roll these out quite as thinly to prevent tearing.

Rosemary Garlic
Add 1T dried rosemary and 2T finely minced garlic to the dough. You will likely need to add a bit more flour (up to ½ cup) to counter the extra moisture in the garlic.

Honey/Wheat
Substitute one cup wheat flour for one cup of the all-purpose flour. Add 1T honey.


Sunday, May 20, 2012

Parker Riley Barnes, aka "The Hulk"


He finally showed up! I had to go in and be induced, but Parker Riley Barnes consented to be born on May 15, 2012 at 6:41 PM. He weighed a whopping 9lbs 8oz. The entire stay at the hospital, every nurse that came in exclaimed over how big he was.
He's a big boy!  85% in weight, 92% length

When we finally got to go home, we were unsure how Zoey would react. After all, we had disappeared for two days – the first time in her entire life we spent a night without her – and come home with a new child. She was thrilled! She had an amazed look on her face and just wanted to look and look at Parker. She kept saying “BIG baby!” I think she expected him to be the size of one of her dolls.

He's bigger than a burrito from Gorditos!
Since then, she's mellowed out a bit towards him, but still wants to hold him quite a bit. Unfortunately, that usually coincides with when I'm feeding him, which doesn't work out so well! The only time she's been eager to give him back was last night when she was holding him and he audibly pooped, causing her to recoil and say “Here you go, Mama” and bolt from the chair.
This is the best game EVER!

This onesie was made at my baby shower; Misty had us all create custom dino clothes for Parker

He has a nose!


She also likes to play with him on his floor gym. She mimics what he's doing, giggling the whole time. So far, his tummy time has been pretty impressive – he's already rolled over a couple of times, once at two days old and again at four days old! He also managed to push himself from one side of the mat to the other. I'm pretty sure he's going to be a professional athlete.
They'll always play this nicely together, right? 
Trying to crawl and getting pretty upset at the lack of traction

Things I've learned:  
1) the rocking chair needs a more comfortable pad. This wouldn't be an issue if Parker would learn to sleep in his crib at night instead of demanding an all-you-can-eat buffet between 11PM and 4AM. I know I could move to the living room with him and have more comfortable seating, but for some reason, I'm convinced that staying in his room will lead to him figuring out the whole night/day thing faster. There's no evidence of this, but hey – it's only been four nights...and last night, he actually slept in his crib for almost 45 minutes, so I got a little snooze in the middle of the night, which was wonderful.

2) Boys are expensive. Did you know most insurances don't cover circumcision? Neither did I, until the pediatrician told me. Yikes. We could save money on food simply by being too tired to make food. However, Zoey is not too tired to eat, so we have to make meals anyway.

3) If you get a spurt of energy, use it. It's different from when Zoey was born, because with her, all we had to worry about was us...and we didn't care all that much about ourselves during the initial sleep-deprived weeks. Zoey pretty much insists that we continue life as normal whether or not we have any energy. The saving grace has been those caffeine-fueled spurts of energy that lead to prepping food for quick cooking later on. Not taking advantage of those moments means that we are all cranky and irritable when it comes to making dinner – Zoey because her meals are late and lacking and Randy and I because we have no energy and everything takes too much work to make, especially with a cranky toddler. If we were smarter, we'd have done all this in advance like we kept talking about.


Monday, May 14, 2012

Back to Basics: Baking Soda


Well, Parker hasn't shown up yet. He apparently is quite comfortable where he is, thank you very much! I was positive he'd have arrived by now.  On the plus side, the weather has been gorgeous all week long, and I'm on maternity leave already, so I got to enjoy it!  

Still, it means I'm sitting around waiting...and waiting...and waiting.   I even had an induction scheduled this morning that got bumped to tomorrow.  Not sure how Parker managed that one, the little stinker!

Unfortunately, it means no cute baby pictures to share.  Instead, you get...baking soda! Woo!

I know it's not nearly as exciting, but at least it's not dead air, right? There are several uses for baking soda and vinegar as cleaners. Baking soda can clean a wedding ring with decent results, if you're too cheap/broke to take it in to get cleaned (that's me!). Vinegar can replace rinse agent in a dishwasher or fabric softener in the laundry.

However, none of these really are fascinating uses or provide good pictures. I'm all about pictures. More fun and visually stimulating (although still not terribly exciting) is using baking soda and vinegar to clean your drains. At our last house, we had nasty, nasty drains. We poured gallons of Drain-O and similar products down them with pretty terrible results. Poor results + expensive products + adding nasty chemicals into the ground = three strikes and you're out in my book!

Luckily, this house has better drains, but they still need cleaning occasionally. After a little research (read: mindlessly dinking around on the internet and stumbling across some interesting uses for baking soda/vinegar and then looking at a couple more sites to verify the information) I discovered that this combo can clean drains. Something about the chemical make-up of the baking soda cutting through grease, etc. I think the vinegar is just for fun foaming action. Maybe the bubbles help knock stuff loose as well, but does it really matter after the science experiment you just completed in your sink or tub?

The process:
Pour some boiling water down the drain. This loosens things up a bit, at least at the surface level.


Dump ½ cup or so of baking soda down the drain. Let it sit there for a few minutes. This step involved more work than I expected, mostly because I couldn't remove the stopper to the drain, which meant that I had to work the baking soda into the drain with my fingers. While obnoxious, it wasn't all that difficult.

Well THAT didn't work the way I expected...
It took a few minutes, but I jammed it all in
Ooh!  Ah!  Bubbles!
Pour 1 cup of hot vinegar down the drain. Watch the fun bubbles. Plug the drain for better agitation/knock-stuff-loose-action. I didn't plug mine because a) I was having fun showing Zoey the reaction with baking soda and vinegar and b) the baking soda was packed into the drain so tightly that it wasn't going to move until the vinegar had its way with the soda anyway.

Pour some more boiling water down the drain to rinse it all clear.

People have different results with this, and there are a plethora of methods people use; there are also a lot of people that argue against it. From what I've read, this works best as a preventative measure; it doesn't really eat away at a clog, although it will help cut away the grease that holds a clog in place so it can move on down the line. To me, as long as the drain works better than it did before, it's a success.

The only drain I had that was at all slow was my bathtub. This is usually the worst drain, given the amount of hair I have and its tendency to shed into the drain. The baking soda treatment seems to have worked to speed it up. And hey, if it didn't, it cost me less than a quarter, rather than $4 for a bottle of drain cleaner. That's a cost I can live with.


Next steps:
After Parker is (finally) here, I'm going to try the unfortunately named “no-poo” method. Luckily, the “poo” in the name stands for shampoo. Why proponents think people will want to try it after giving it that name escapes me. On the other hand, I'm going to give it a shot, so I guess it worked after all. Basically, it calls for using baking soda/water instead of shampoo and replacing conditioner with apple cider vinegar.

The theory is that commercial shampoos over-strip your hair and convince your scalp it needs to produce more oil than necessary, which then requires you to shampoo more frequently with even crazier chemical compounds. I'm all for simplicity (and saving money – baking soda is $0.50/lb in bulk, which is significantly less than the cheapest shampoo), so I have wanted to try this for a while.

The only problem is that it takes a couple of weeks for your head to stop over-producing oil, which means you look pretty greasy while you adjust. That's why Parker's arrival will make such a good time to try it – no-one expects a new mother to look her best. 

And hey - if it works, I may never have to clean the tub drain again, since I'll be sending baking soda and vinegar down it on a regular basis!

Next week will be Parker pictures – there's no WAY he's not going to be here by then.


Monday, May 7, 2012


It started when Randy's brother, Cody (aka Uncle Buck), sent him some messages on Facebook – he wanted to make jam. There were two recipes he wanted to try: spiced blueberry and apple. I was all for it, although I will admit to some hesitation when I realized the two of them would make the jam while I was at work.

Boys in the kitchen. Unsupervised. With alcohol. And boiling sugar. Yikes!

On the other hand, jam is pretty easy and foolproof. Also, it worked out well for us in that Cody was providing everything but the jars and the pectin. Randy was providing the “experience” and the kitchen.

Needless to say, I left work as quickly as possible that day so I could see how they did/assess the damage. When I got home, they were working on the second batch – the blueberry spice. Their commentary went something like this:

Cody: Ok, now we add the sugar and boil for five minutes
Randy: Huh. I added sugar a long time ago.
Cody: Oh. Uh...then I guess we add the stuff and call it good?

I'm pretty sure that was how the first batch went as well; wasn't there for most of it, as I said, but they took pictures, so I'll provide a pictorial essay.
First step: set up the all-important directions.  Use your wife's laptop in case  of industrial accidents...


Get the canning kettle going. Uncle Buck demonstrates how to use a lid!

Put some sugar and other spices in a pot.
Chop up some apples.  Be sure to have all the ingredients out on the counter
Are you two sure you used a big enough pot?  That's a lot of apples.
The toddler was right - pot upgrade initiated!

Apple jam in the jars and ready to seal - looking pretty good.
Hot.  HOT!  Someone should have used a potholder...
ANOTHER batch? Are you sure?
Start over, measuring out the blueberries
Every surface of the kitchen was covered in jam-making paraphernalia, and Zoey was on a huge sugar high, since her Uncle Buck kept feeding her cookies, but it all turned out well - each batch made six or seven jars, and they all sealed well.
I like it when Uncle Buck comes over!  Cookies for everyone!

The end result was pretty tasty, although the blueberry jam has anise in it, which I'm not a huge fan of (I have a lifetime supply, though, because Cody left his jar here and he only used a little of it!)

Recipes: 
1.2 kilo apples
1 kilo sugar
1 packet of pectin
1 teaspoon vanilla sugar
2 teaspoons of ground cinnamon
1 Big bowl of water with the juice of 1 lemon squeezed into it.

*Quarter the apples, peel and core them, then chuck every apple quarter into the bowl with water and lemon juice.  (This will keep the apples white/ green/ yellow (so they don't get brown and horrible )).
*Once you have cored and peeled and quartered all the apples , stage 2 is getting all the apple quarters thinly sliced, then in thinly cubed.Think 1 x 1 mm !
*Chuck the tiny cubes all in the big pan, add the sugar, the of pectin ( don't breathe in, it will make you cough ) the vanilla sugar, and the cinnamon.
*Stir the whole thing through- ( this can be a bit heavy going ) till you have a thick gloop.
* Put it on a medium heat and cook for at least half an hour, stirring frequently.  Don't go and do something else and leave it bubbling away.
*Test if the apple is "done " ( = soft )- this can take quite a bit of time.( so say make it at least 40 minutes).
*WHILE waiting for the apples to cook: Let the jars you intend to use for your jam run through a dishwasher cycle, till they are clean and warm, or clean them with boiling water.  Put the lids in a small saucepan and bring to a simmer.  Turn off the heat, and let lids sit in the water.
*Fill your canning kettle 3/4 with water and bring to a boil
*Fill the jars, leaving 1/2 inch headroom
*Wipe the rims clean, then put on a lid, screwing the ring on tightly
*Fully submerge in the boiling water for approximately 10 minutes.  
*Remove and let cool - you will hear a popping sound as the lids seal.

Spiced Blueberry Jam from this instructable
1 1/2 lbs . Blueberries (fresh or frozen)
3 cups Sugar
1/2 cup Water
2 Tablespoons Lemon Juice
5 Tablespoons (2 1/2 oz) Cider Vinegar
1/4 teaspoon Star Anise (finely ground)
1/4 teaspoon Ground Cinnamon
10 - 20 grinds fresh Nutmeg (1/4 teaspoon pre-ground)
1 Packet of Pectin

*Run all jars through a cycle of the dishwasher or boil for 10 minutes.  Put the lids in a small saucepan and bring to a simmer, then turn off heat, leaving lids in pan.
*You need to grind up the spices, especially the star anise. Put them in the coffee grinder until finely ground.
*Place blueberries in the saucepan over medium-low heat. Sprinkle with the pectin, followed by the cider vinegar, spice mixture, and lemon juice.
*Once liquid starts to gather in the bottom of the saucepan, bring the heat up to high, and bring to a boil.
*After reaching a boil, lower the heat slightly and boil gently for 5 minutes, mashing it occasionally.
*Mash in the sugar, and add the water. Return to a boil for 1 minute. 
*Fill your stockpot 3/4 of the way full with water, and put your dish towel/canning rack into the bottom.  Bring to a boil.
*Fill jars, leaving 1/2" head room.  With a clean towel, wipe any spills from the rim
*Place the lids on the jars, screwing the rings on as tightly as you can.
*Place jars into stockpot and boil for approximately 10 minutes. 
*Remove jars and put on a towel or rack on the counter to cool.  You will hear a pop as each jar seals.

Next week's post will probably be on Parker's birth and mostly include a zillion baby pictures.  If it's not...well, he's late to the show!